Battle of Myriokephalon 1176: Byzantium’s Last Anatolian Gamble
On 17 September 1176, a Byzantine army led in person by Emperor Manuel I Komnenos marched into a narrow mountain pass in Phrygia and came out of it defeated. The battle ended Byzantium’s last serious attempt to retake central Anatolia from the Seljuk Turks. It takes its name from the ruined fortress of Myriokephalon that stood nearby, though the fighting itself unfolded in the adjoining pass of Tzibritze. Unlike the Battle of Mantzikert a century earlier, no emperor was captured at Myriokephalon and no civil war followed. Yet the outcome was final in one respect all the same: after 1176, Byzantium never again mounted a major offensive to reclaim the Anatolian plateau it had lost since Mantzikert.
What was the battle of Myrokephalaion
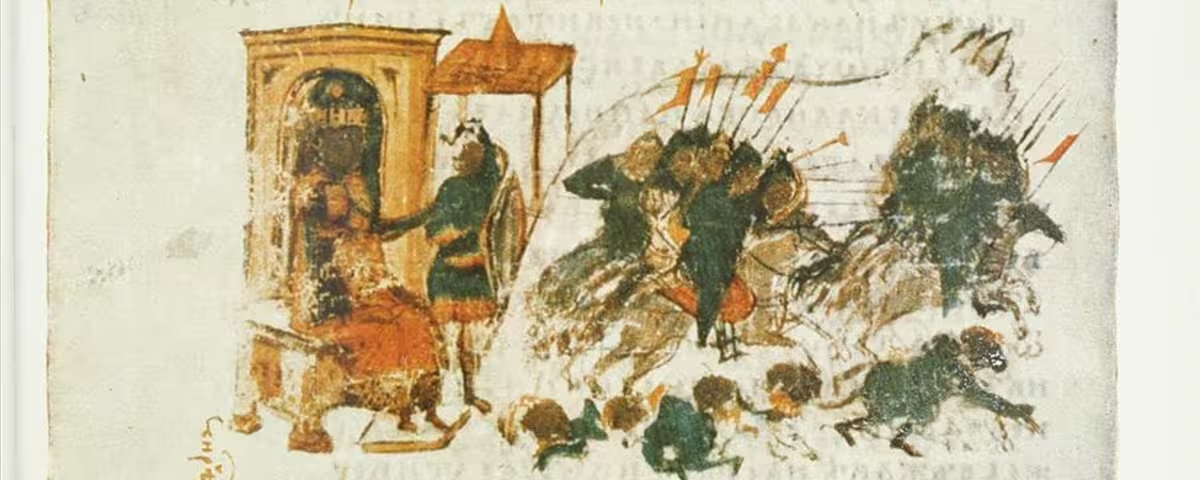
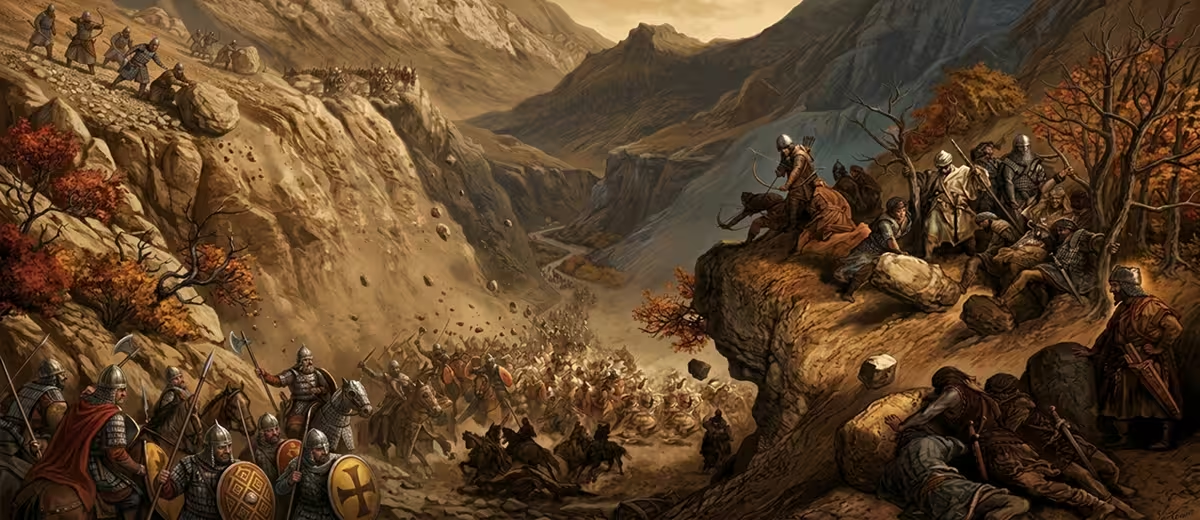
The Battle of Myriokephalon (also spelled Myriocephalum; Turkish: Miryokefalon Savaşı) was fought on 17 September 1176 between the Byzantine army of Emperor Manuel I Komnenos and the Seljuk Turkish army of Sultan Kilij Arslan II of the Sultanate of Rum. The battle took place in the pass of Tzibritze, in the mountains west of Iconium (modern Konya) in west-central Anatolia, close to a ruined fortress that gave the battle its name. Seljuk forces ambushed the strung-out Byzantine column as it moved through the pass, inflicting heavy losses on several divisions and destroying Manuel’s siege train. The Byzantine army was battered but not destroyed, and the two rulers agreed a truce within days. The battle is remembered less for its immediate casualties than for what it ended: Byzantium’s last realistic hope of driving the Seljuk Turks out of the Anatolian interior.
Background: the fragile peace of 1161–1175
Myriokephalon did not come out of nowhere. It followed roughly fifteen years of an uneasy but real peace between Byzantium and the Seljuk Sultanate of Rum, a peace that both sides used to strengthen themselves elsewhere before it finally broke down.
The 1161 treaty and Kilij Arslan’s visit to Constantinople
Between 1158 and 1161, a series of Byzantine campaigns against the Seljuks of Rum produced a treaty favourable to Constantinople, under which Sultan Kilij Arslan II accepted a form of subordination to Manuel I Komnenos. Kilij Arslan then travelled to Constantinople in person, where Manuel received him as an honoured guest and, at the same time, as an imperial vassal. For several years afterward, open hostility between the two powers ceased. It was, from the start, a fragile arrangement: the Seljuks wanted room to expand from the arid central plateau into the richer coastal lowlands, while Byzantium wanted to recover the Anatolian territory it had lost since the Battle of Mantzikert a century before. Both sides had reasons to keep the peace only for as long as it suited them.
The lull suited Manuel well beyond the eastern frontier. He used these years to defeat Hungary and assert Byzantine control over much of the Balkans, to recover Cilicia from local Armenian rulers, and to reduce the Crusader Principality of Antioch to vassal status. The same years suited Kilij Arslan just as well: freed from Byzantine pressure, he set about eliminating his internal Turkish rivals and building up the military resources he would need later.
The peace unravels: the Danishmend inheritance
The peace unravelled over a dispute about inheritance rather than a sudden invasion. The powerful Muslim ruler of Syria, Nur al-Din Zangi, died in 1174, and his successor Saladin turned his attention toward Egypt and Palestine rather than the frontier with Byzantium. That shift left Kilij Arslan free to move against the Danishmend Turkish emirates of eastern Anatolia and to expel his own brother, Shahinshah, from his lands around Ankara. Shahinshah was a Byzantine vassal, and he fled to Manuel’s protection along with the displaced Danishmend emirs. Under the terms of the 1161 treaty, Kilij Arslan was obliged to hand over to Byzantium a substantial share of the territory he had just conquered from the Danishmends. In 1175 he refused. The peace collapsed, and Manuel began preparing a campaign meant to settle the eastern question once and for all.
The opposing forces
Manuel I Komnenos and the Byzantine army
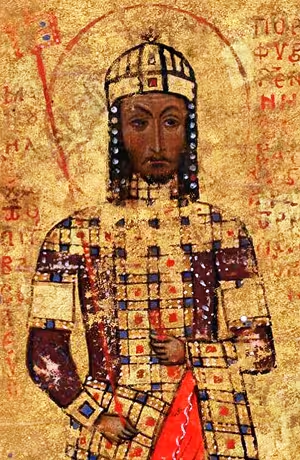
Manuel I Komnenos had reigned since 1143 and had spent much of that reign asserting Byzantine power on several fronts at once, from Italy to the Balkans to the Levant. By 1176 he judged the time right to break Seljuk power in Anatolia for good, and he gathered an exceptionally large army at Lopadion. According to Manuel’s own later account, in a letter to King Henry II of England, the column stretched some ten miles along the road. Modern historians estimate its true size more conservatively: John Haldon puts it at 25,000–30,000 men, while John Birkenmeier arrives at roughly 35,000, a figure he derives in part from reports of a supply train of some 3,000 wagons.
Alongside the core Byzantine troops marched a Hungarian contingent sent by Manuel’s kinsman Béla III, tributary forces supplied by the Principality of Antioch under Baldwin of Antioch (Manuel’s brother-in-law), and troops from Serbia. Whatever the precise total, all sources agree the army was unusually large, and it travelled with a heavy baggage and siege train intended for a prolonged assault on the Seljuk capital.
Kilij Arslan II and the Seljuk army
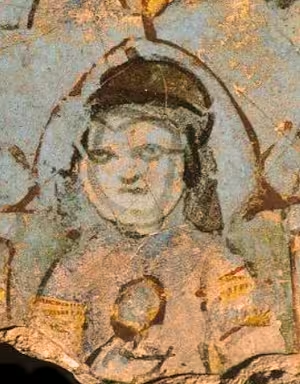
No reliable figure survives for the Seljuk force Kilij Arslan brought to Tzibritze. Modern historians estimate that the various post-Seljuk successor states, the Sultanate of Rum among them, could field at most 10,000–15,000 men at this period, considerably fewer than the united Seljuk Empire had mustered at Mantzikert a century earlier.
The sultan’s army combined two very different elements: the askars, full-time professional cavalry, often of mamluk origin, armoured and disciplined, who formed the core of any Seljuk field force; and large numbers of Turkoman tribesmen, semi-nomadic irregular horse-archers who fought for plunder and ransom under their own chieftains rather than for pay. The Turkomans were unreliable in a set-piece battle but highly effective at skirmishing and ambush, exactly the kind of fighting the terrain around Tzibritze favoured.
The march to Myriokephalon
The Byzantine army marched from Lopadion toward the Seljuk capital at Iconium by way of Laodikeia, Chonai, Choma, and the fortress of Antioch-in-Pisidia, re-fortifying key strongpoints such as Dorylaion and Soublaion as it went. Kilij Arslan tried repeatedly to negotiate. Confident in the size of his army, Manuel rejected every offer of peace, determined to force a decisive engagement rather than settle for another temporary truce.
Manuel also divided his forces. He sent a detachment under Andronikos Vatatzes north toward Amasya while the main army continued toward Iconium. Both routes ran through heavily wooded country well suited to ambush, and the northern detachment was destroyed in exactly such an attack; Turkish forces later displayed the severed head of its commander during the fighting at Myriokephalon itself. Meanwhile, Kilij Arslan avoided a pitched battle in the open, instead harassing the main Byzantine column, burning crops, and fouling water supplies to slow and weaken it. He steered Manuel’s army toward the narrow pass of Tzibritze, near the ruins of the old fortress of Myriokephalon. Manuel could instead have tried to draw the Seljuks onto the nearby plain of Philomelion, where his grandfather Alexios I Komnenos had won a battle sixty years earlier under similar circumstances. Short of forage and water, and with dysentery reportedly spreading through the ranks, he chose to force the pass instead.
The Battle of Myriokephalon, 17 September 1176
Into the Tzibritze Pass
Manuel organised the army into a long column of separate divisions, each self-sufficient enough in principle to act as a small independent force. In order of march: a vanguard composed largely of infantry; the main division, drawn from the eastern and western tagmata; the right wing, made up chiefly of Antiochene and other western troops under Baldwin of Antioch; the baggage and siege train; the left wing, under Theodore Mavrozomes and John Kantakouzenos; the emperor and his household guard; and, at the rear, the experienced general Andronikos Kontostephanos.
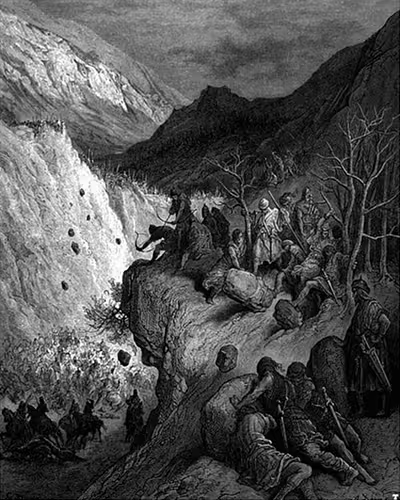
The vanguard and the main division entered the pass first and passed through with comparatively few losses, their infantry clearing Seljuk troops from the high ground on either side before advancing. It is possible the Turks had not yet fully deployed. The divisions that followed did not take the same precaution and, according to Niketas Choniates, advanced without maintaining tight ranks or using their archers effectively. By the time the leading divisions had cleared the far end of the pass, the rearguard was only just entering it: the trap closed on everything still strung out in between.
The ambush closes
The Turkish attack, descending from the heights on both sides, fell hardest on the Byzantine right wing. That division broke quickly, its soldiers fleeing one ambush only to run into another; Baldwin of Antioch was among the dead. Seljuk forces then turned on the baggage and siege train, shooting down the draught animals and blocking the road with wreckage, effectively destroying the equipment Manuel needed to besiege Iconium. The left wing also took heavy casualties, and John Kantakouzenos was killed fighting alone against a group of Seljuk soldiers. A dust storm swept the pass as the fighting intensified, adding to the disorder on both sides.
According to Byzantine sources, the dead on the field were later found scalped and mutilated, reportedly so that the losses of the two armies could not be distinguished by whether or not the fallen were circumcised — a detail meant to make the scale of the victory harder to dispute.
Manuel’s crisis and the second day
Niketas Choniates records that Manuel, confronted with the carnage around him, briefly lost his composure and sat down as if resigned to whatever followed, and that he considered slipping away from his own army in secret before being talked out of it by his officers. Modern historians treat this episode with some caution: unlike Romanos IV Diogenes at Mantzikert, Manuel’s own troops had not scattered, and abandoning a still-organised army would have put him in greater danger, not less. Whatever actually passed through Manuel’s mind, he was roused into action, re-established order among his own guard, and fought his way out of the pass to rejoin the vanguard and main division, which had built a fortified camp while waiting. Kontostephanos and the rearguard reached the same camp somewhat later, having suffered comparatively light losses. The army spent the night beating off further Seljuk attacks. The next day brought no renewal of general fighting: Turkish riders circled the camp shooting arrows at a distance, Manuel launched two limited counterattacks, and neither side pressed for a decisive second engagement.
Aftermath: a fragile peace
With his siege train destroyed, Manuel had no way of continuing toward Iconium. Kilij Arslan, for his part, showed no interest in pressing his advantage to destruction; it was the sultan, not Manuel, who sent the first peace overture, dispatching an envoy named Gabras with gifts of a fine horse and a sword to open negotiations. That the victor proposed terms rather than the defeated side is one reason historians doubt that the Seljuk army came away from Tzibritze in much better shape than the Byzantines, or that Kilij Arslan believed he could finish the Byzantine force off in a second engagement.
The terms were, on paper, straightforward: the Byzantine army would be allowed to withdraw unmolested, in exchange for Manuel demolishing the frontier fortresses of Dorylaion and Soublaion and evacuating their garrisons. In practice, Turkoman raiders, over whom Kilij Arslan had limited control, harassed the retreating Byzantines anyway, and Manuel used both this and an earlier Seljuk breach of the 1161 treaty as grounds to only partly honour his side of the bargain. He demolished the less important fortress of Soublaion but left Dorylaion’s fortifications standing.
Manuel sent word of the defeat to Constantinople ahead of his own return, comparing his situation explicitly to that of Romanos IV Diogenes at Mantzikert a century earlier — while, in the same message, emphasising the favourable terms he had personally secured. It was a calculated piece of damage control, and it worked well enough: no faction moved against Manuel at home, and no civil war followed, in sharp contrast to what had happened after Mantzikert. In his remaining years, Manuel continued to campaign against the Seljuks with occasional success, won a clear victory over a Seljuk raiding force at the Battle of Hyelion and Leimocheir in 1177, and concluded what most historians regard as a genuinely advantageous peace with Kilij Arslan in 1179.
Impact and legacy
Not a second Mantzikert? The historiographical debate
Historical debate. How decisive Myriokephalon actually was is a genuine point of disagreement among historians, not a settled question. One camp reads it as a serious but contained tactical defeat that Byzantium absorbed without lasting structural damage. Another reads it as the quiet turning point at which Byzantium’s chance of ever retaking the Anatolian interior closed for good, whatever the absence of an immediate political collapse. Both readings are represented below.
Manuel’s own comparison to Mantzikert shaped how later Byzantine writers, and some modern popular accounts, have remembered Myriokephalon: as a second national catastrophe. Most specialist historians today push back against that framing. Unlike after Mantzikert, no emperor was captured at Myriokephalon, the bulk of Byzantine Asia Minor remained in Byzantine hands for more than a century afterward, and even Niketas Choniates, who blamed Manuel personally for the defeat, admitted that the frontier in Asia Minor did not collapse in its immediate wake. The Byzantine victory at Hyelion and Leimocheir the following year is often cited as proof that the army’s fighting capacity had not been broken. On this reading, Myriokephalon was a serious tactical defeat and a personal humiliation for Manuel, but not the structural disaster that Mantzikert and its aftermath had been.
Other historians argue the distinction can be overstated in the other direction. Even without a civil war, Myriokephalon marked the point at which Manuel’s ambitious strategy of rolling back Seljuk power in Anatolia was abandoned for good, and it exposed just how firmly the Sultanate of Rum had entrenched itself by the 1170s. The debate, in other words, is less about whether Myriokephalon mattered than about what kind of defeat it was: a battlefield reverse Byzantium could absorb, or the moment its last realistic chance to retake the Anatolian interior quietly closed.
A name that outlived its accuracy
The battle’s name is, strictly speaking, a misnomer. According to Niketas Choniates, the ruins of a fortress called Myriokephalon stood near the pass where the fighting actually took place, and the battle was named after that landmark rather than after the site of the fighting itself, which was the pass of Tzibritze. The precise location of Tzibritze has itself been a matter of scholarly debate for decades; the Oxford Dictionary of Byzantium places it north of Lake Eğirdir in Pisidia, while other studies locate it further east, closer to Lake Beyşehir, west of Konya. No definitive archaeological identification of either the pass or the ruined fortress has been established.
Disputed location. The precise location of the Tzibritze Pass, and therefore of the battle itself, is not settled among historians. The Oxford Dictionary of Byzantium places it north of Lake Eğirdir, in Pisidia. Other scholarship — notably E. Eickhoff’s 1982 study “Der Ort der Schlacht von Myriokephalon” — argues instead for a site further east, closer to Lake Beyşehir, west of Konya. No excavation has confirmed either identification, so both remain scholarly proposals rather than settled fact. Treat any map or precise coordinates for the battle as one reconstruction among competing ones, not a fixed location.
The end of Byzantium’s Anatolian ambitions
In the years immediately following the battle, Manuel partly repaired the damage: he kept Dorylaion in Byzantine hands despite his promise to raze it, and he repelled a Seljuk attack on the city of Klaudioupolis. But the underlying trend proved impossible to reverse. Manuel died in 1180, and the empire drifted into the political instability that followed, including the far greater catastrophe of 1204 a generation later. Dorylaion and Kotyaion, the two major bastions guarding the western approach to the plateau, had fallen into Turkish hands by 1182. The whole region around them was exposed to Turkish raids and gradual nomadic settlement, and by the end of the twelfth century it had become permanently Turkish in character. Byzantium’s plans to reassert supremacy over the Seljuks in Anatolia, the strategic goal Manuel had marched to Tzibritze to secure, were abandoned for the rest of the empire’s history.
Frequently asked questions
What caused the Battle of Myriokephalon?
The immediate cause was Kilij Arslan II’s refusal to hand over Danishmend territory he had conquered, as required under an 1161 treaty with Byzantium. When negotiations failed, Manuel I Komnenos marched a large army toward the Seljuk capital of Iconium to force the issue, and Kilij Arslan drew the Byzantine column into an ambush at the Tzibritze Pass.
Who won the Battle of Myriokephalon?
The Seljuk Turks won a clear tactical victory, inflicting heavy losses on parts of the Byzantine army and destroying its siege equipment. The Byzantine army was not destroyed, however, and it fought its way out of the pass under Manuel’s command. Kilij Arslan proposed peace rather than pressing for a second battle.
Was Myriokephalon as disastrous as the Battle of Mantzikert?
Most historians say no. No emperor was captured, no civil war followed, and Byzantium kept most of its Anatolian territory for another century. Where Mantzikert triggered a decade of internal collapse, Myriokephalon ended Manuel’s specific campaign to retake the interior without triggering an equivalent domestic crisis.
Where was the Battle of Myriokephalon fought?
In the pass of Tzibritze, in the mountains west of Iconium (modern Konya), near the ruins of a fortress called Myriokephalon that gave the battle its name. The exact location of the pass is still debated among historians.
What happened to Manuel I Komnenos after the battle?
Manuel survived, negotiated a truce, and continued to rule until his death in 1180. He won further, smaller victories against the Seljuks and secured an advantageous peace with Kilij Arslan in 1179, but he never again attempted a major campaign to reconquer central Anatolia.
Sources and further reading
Oxford Dictionary of Byzantium — entry “Myriokephalon”
Select bibliography:
Niketas Choniates, Historia (trans. H. Magoulias, O City of Byzantium: Annals of Niketas Choniates, Detroit, 1984)
Paul Magdalino, The Empire of Manuel I Komnenos, 1143–1180 (Cambridge, 1993)
Michael Angold, The Byzantine Empire 1025–1204: A Political History (Longman, 1984)
John Haldon, The Byzantine Wars (Tempus, 2001)
John W. Birkenmeier, The Development of the Komnenian Army: 1081–1180 (Brill, 2002)
Warren Treadgold, A History of the Byzantine State and Society (Stanford, 1997)
E. Eickhoff, “Der Ort der Schlacht von Myriokephalon,” VIII. Türk Tarih Kongresi, vol. 2 (Ankara, 1982)